As Professional Organizers, we get asked all the time what our biggest tips for organizing kids’ memories are. Our children’s memories are special, but it’s difficult to keep everything. So here are three quick tips for organizing your child’s memories.
TIP ONE: SIMPLIFY THE KEEPSAKES
Our first tip for organizing your child’s memories is to keep a few special things from each phase of their life. We recommend focusing on keepsakes that you both can look back on fondly while demonstrating their growth over the years. Here are some examples:
- Report Cards: Keep their best one from the year!
- Artwork and Crafts: Choose a few pieces from each year that showcases their creative journey. Rather than a scribbled coloring book page, choose original artwork from their imagination!
- Photos: Class photos, field trips, and special school events help preserve memories of friends and experiences.
- Certificates and Awards: Recognitions and awards are an essential part of a child’s school life. Try to choose the most impressive or meaningful from each year.
TIP TWO: CREATE A MEMORY STORAGE SYSTEM
Our second tip for organizing your child’s memories is to create an easy system to store all your child’s memories. You don’t want it to take up too much space in your home, or be too cumbersome so you never add to it. That is why we created our Kids’ Memory Boxes. They are an easy way to store memories from pregnancy, up to 12th grade – all in one box. It is cute to display in your home and has a great system complete with file folders for each phase of your child’s life.
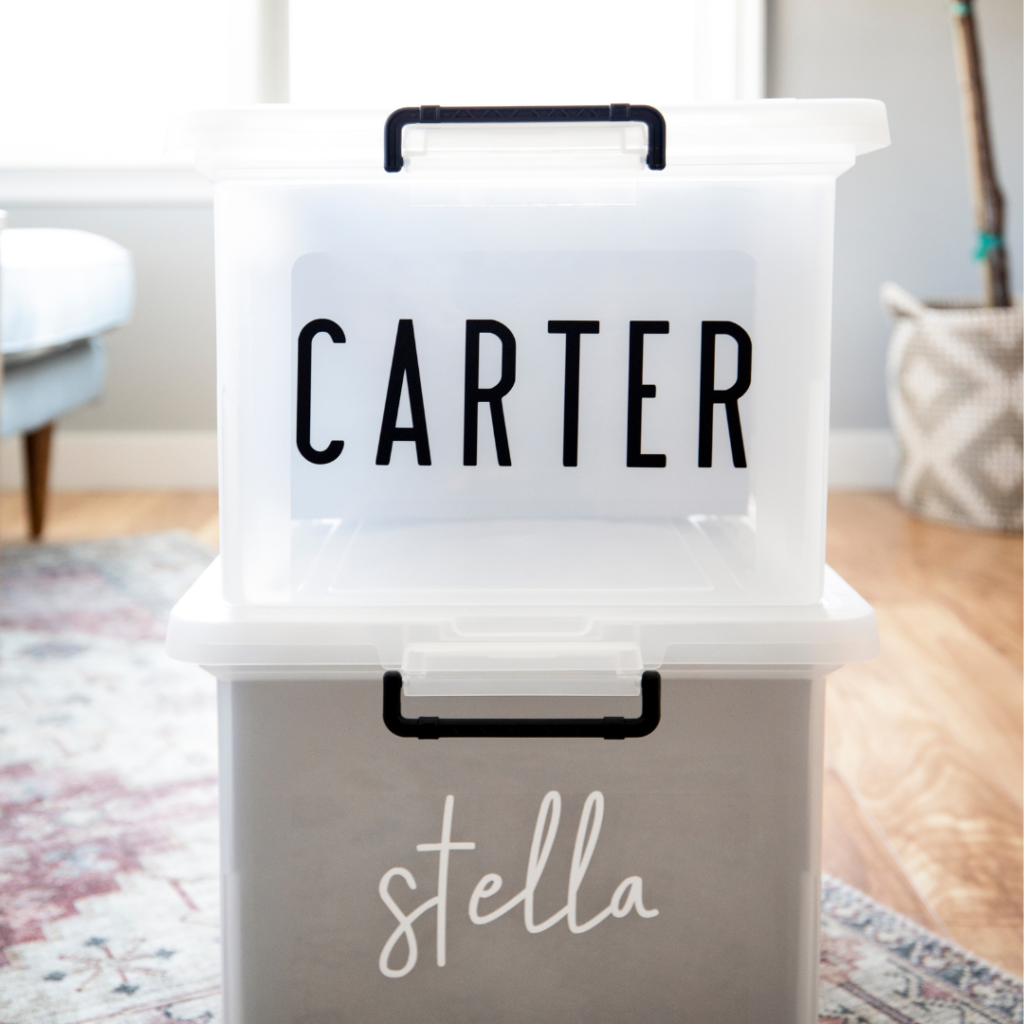
Our Kids’ Memory Boxes are easy to take out and add to every year, plus it’s a keepsake that encapsulates the essence of your child’s years at home. If you are local to Utah, you can get your Kids’ Memory Box made and pick it up in Salt Lake City. Place your order here.
Another great option if you are outside of Utah or simply enjoy a nice DIY project is to use our Kids’ Memory Box Starter Kits. They come with our adorable All About Me printouts, file tabs, and a personalized name decal for the front of your box. With the All About Me printouts, you can interview your little one every year and capture their personality as they grow! Here is what those printouts look like when they are all filled out.
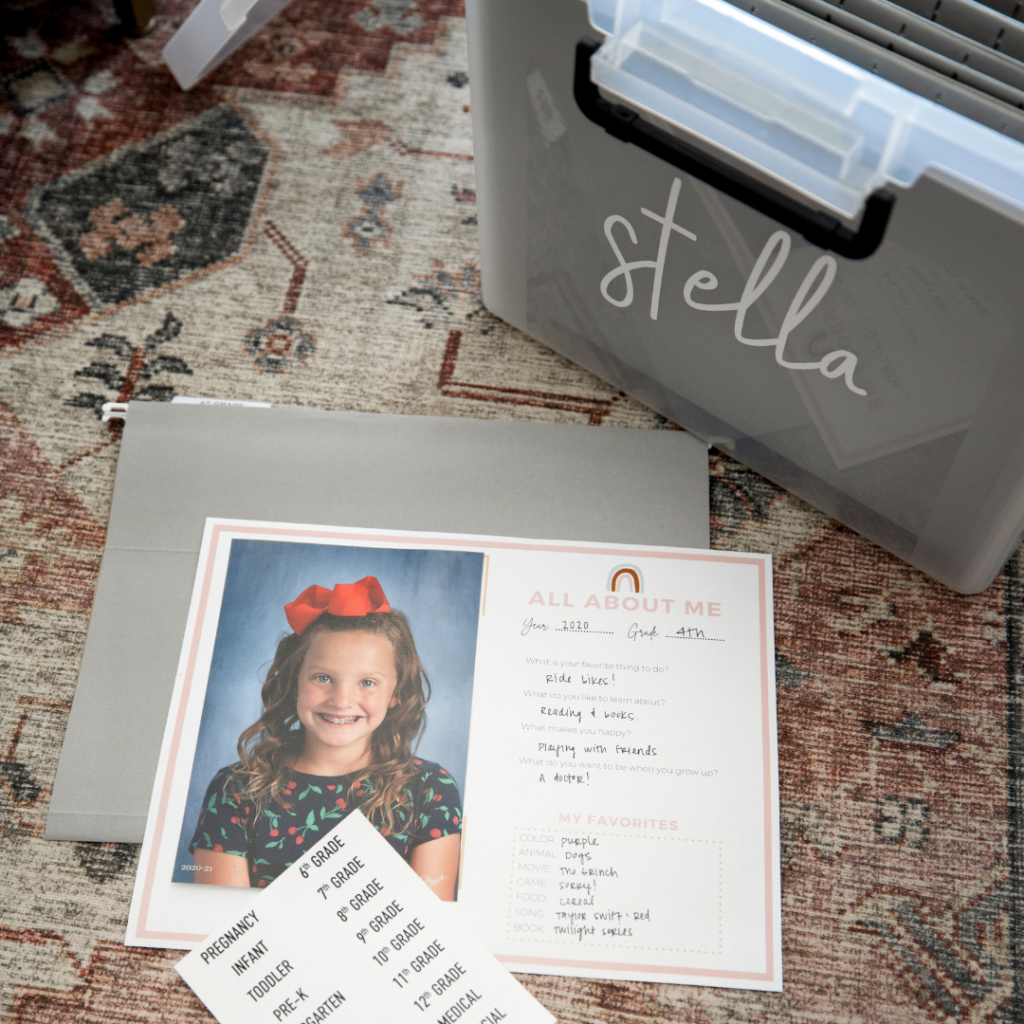
With our Starter Kit, all you need is a box and file folders to assemble your own Memory Box! Here are some of the file boxes and file folders that we recommend.

TIP THREE: JUST GET STARTED
The third tip for organizing is to get started today. If your children are old enough, make this a fun project to do together by editing what you’ve kept over the years with them! If they aren’t, start on your own or with your partner. Consider some milestones to do this such as every Fall when the kids are back in school or at the end of the school year when they are cleaning out their backpacks. You don’t need to get everything done in one sitting, you can break it up if you’re feeling overwhelmed.
We hope you feel empowered and learned something from our tips for organizing. Click here to get more tips for organizing sent to your inbox once a month. If you want to see what our Memory Boxes look like full of memories, click here!